Pages

Monday, 1 February 2021

Spicy Pork & Noodle Omelette


This is the first time I’ve tried a Marion Grasby recipe. When I saw it on YouTube, I was quite apprehensive. I felt like saying, “Damn girl, who the hell adds noodles to an omelette?” As fate would have it, just a couple of days later, I had some left-over Maggi Chicken Noodles (made with a spoonful of my Multi-Purpose Masala added). I told myself, ‘what the heck, let me give this a try.’ Luckily, Marion had mentioned we could use any noodles (ramen, egg, rice - just about any would do). I picked up the phone and ordered some oink mince. That night, I whipped up this Spicy Pork & Noodle Omelette for dinner. I’m so darn glad I did. This was a super delish dinner! Regardless of whether Marion reads this, I have to say, ‘Thank you, Marion. This recipe is a keeper!”

Marion claims this is a 10 minute-week night recipe. Had she sent me her team to keep everything prepped, it would have been. *wicked grin* In all honesty, it’ll take about 45 minutes. Faster than most recipes, sure; but 10 minutes?? Hell, no!

I followed Marion’s recipe with some tiny changes. I’m going to pen this exactly as I made it. This is my way to ensure the recipe does not go wrong when you recreate it. This recipe makes three (2-egg) omelettes.

Ingredients for Pork Mince:

250 grams pork mince (I used Prasuna Pork Mince)
2 cloves garlic, grated or chopped
2 Thai bird’s eye chillies, chopped
2 tablespoons fish sauce
1 teaspoon sweet dark soy sauce
2 teaspoons red chilli powder (I used Deghi Mirch powder0
1 cup baby spinach, chiffonade cut
1 tablespoon oil

Ingredients for Omelette:

6 eggs (2 eggs per omelette)
3/4th teaspoon (¼ teaspoon per omelette) white pepper powder
3 teaspoons fish sauce (1 teaspoon per omelette)
150 - 180 grams cooked noodles (50 - 60 grams per omelette)
6 to 7 tablespoons oil (2 to 2.5 tablespoons per omelette)

Garnish:

Juliennes of chillies or chopped coriander leaves

Method for Pork Mince:

  1. Heat oil and add pork mince. Sauté for a few seconds.


  2. Add the chopped garlic and chillies.


  3. Sauté the pork mince until it loses its clumpy texture and begins to get grainy. If need be, use a fork to rid the mince of its clumpy texture.
  4. Continue sautéing the pork on low flame until it is nearly cooked. (If the mixture feels too dry, add a couple of teaspoons of water - don’t worry, it’ll dry up by the time the pork gets done)


  5. Add fish sauce, sweet dark soy sauce, chilli powder and sauté until the flavours come together.


  6. When the mince is cooked, add the spinach, and toss for half a minute or a minute, until the spinach wilts and cooks.


  7. Remove the cooked mince into a bowl. Keep warm until needed.

Method for Omelette:
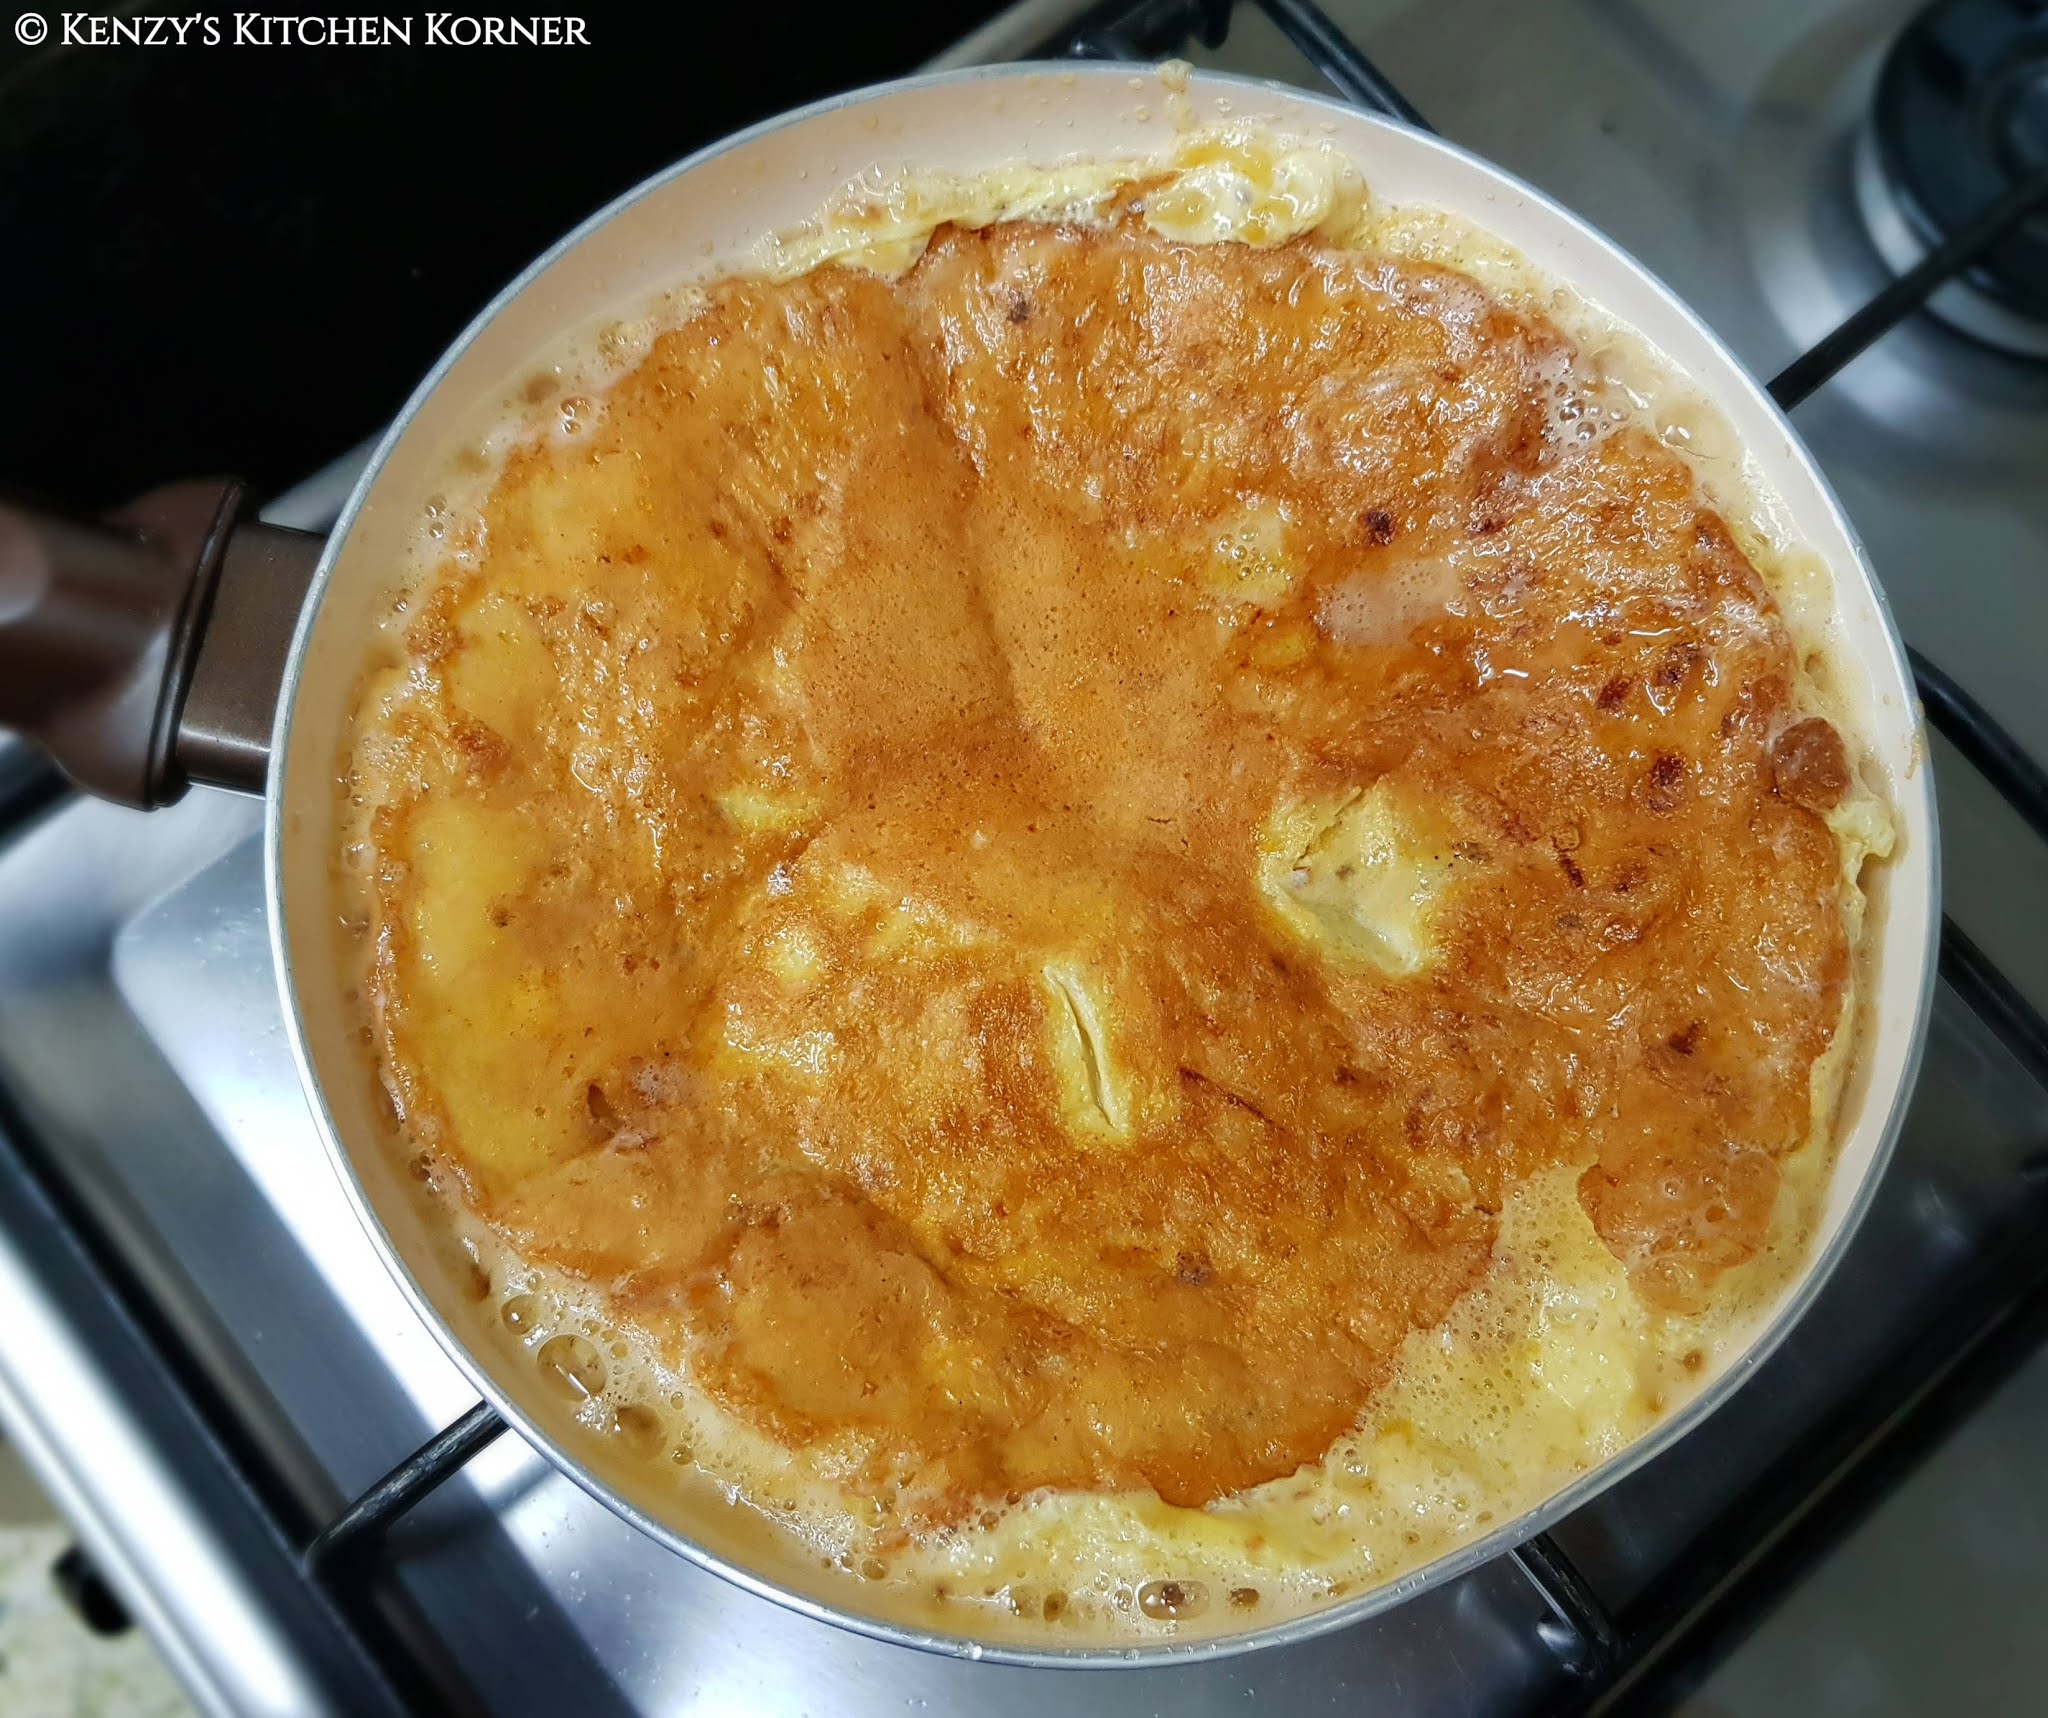
  1. Break 2 eggs in a bowl. Add 1 teaspoon fish sauce, ¼th teaspoon white pepper powder and whisk the eggs to mix well. Do NOT over froth.

    I made the first omelette with three eggs hence this photograph. Trust me, go with two eggs. 

  2. Add 50-60 grams cooked noodles and give the eggs a gentle whisk.


  3. Heat oil in an 8-inch pan.


  4. Add the egg-noodle mixture. LOWER heat and allow the omelette to cook until golden brown. (This is an Asian style omelette, this is not a colourless French omelette)


  5. Flip the omelette carefully and cook until the other side is a gorgeous light yellow.


  6. Flip the omelette once more on to its golden-brown side. Fold it into a half-moon.


  7. Carefully remove the folded omelette onto a plate.


  8. Spoon the warm pork mince over the omelette and garnish with julienned chillies or chopped coriander. Serve.
  9. Repeat the process to make two more omelettes.
Chef Notes:
  1. No salt was used for this recipe as fish sauce lends saltiness to the oink (pork) and the eggs.
  2. Yes, please USE fish sauce as the flavour it lends to this dish is AMAZING!!
  3. Use any mince (chicken, beef, buff, mutton). The original recipe used pork mince, and I 'laaau' pork, hence went with the original protein.
  4. I had these gorgeous Thai bird’s eye chillies hence used them. Go with any chillies available in your pantry.
  5. Marion’s recipe used Thai basil leaves while I opted for baby spinach. Why? Coz, I do eat basil, but I prefer baby spinach. If using spinach, I’d advice you stick to baby spinach.
  6. This is a very forgiving recipe, so except for insisting on the use of sweet dark soy and fish sauce, go with whatever you find in the pantry with regard to noodles, herbs, and garnishes.
  7. You may share the direct blog-link of the recipe/s but do NOT publish my recipes and my photographs on any blog-site or website without my explicit consent or attempt to pass off my recipe/s as your own. You will be held accountable for plagiarism.
Some More Photographs:


Thursday, 21 January 2021

Béchamel Chicken Bake


There was a time when I had no clue what a chicken baked dish meant. My masi introduced me to the wonderful world of béchamel/white sauce. She was a pro at making European/Continental food. It was under her tutelage that I learnt to make perfect béchamel/white sauce. I take this opportunity to say, ‘thank you’. She gave me her love, her time and taught me to cook this… and so many other dishes. I would never have learnt to cook, or experienced such food, at that age, had it not been for her. From the bottom of my heart,
‘THANK YOU, Jeroo masi!’ 

Over the years, I have added my twists to Masi’s classic/traditional bake, and this is my take on it; a take I have perfected over the years. I hope the recipe works just as beautifully for you as it has for me over the years.

Ingredients: 

1¼ cup / 150 grams all-purpose flour (Maida)
150 - 175 grams butter
½ tablespoon butter (for mushrooms)
600 grams chicken legs (For me, 2 whole legs and 2 drumsticks equalled 600 grams)
200 mils chicken stock (room temperature)
650 mils milk (room temperature)
200 grams mushrooms, cut into quarters
200 grams tin golden-corn niblets
4 -5 green chilies, finely chopped
½ - ¾ tablespoon Mrs Dash (optional - a seasoning for baked dishes)
150 grams + 150 grams cheese
Salt to taste
Coarsely ground pepper, to taste
   

Method: 
  1. In a large vessel (or a pressure cooker), add the chicken, 600-700 mils water, salt, and pepper.
  2. Cook (or pressure cook) until done.
  3. Drain the chicken from the stock. Reserve 200 mils stock. (Add a squeeze of lime, and sip on the extra stock while you cook 😉)


  4. Shred the boiled chicken (discard bones). Keep aside. 


  5. Grate the cheese. Keep aside. 


  6. Heat ½ tablespoon butter in a skillet, sauté mushrooms for 2 minutes, on HIGH heat, tossing them constantly. Remove from the skillet and keep aside. 


  7. In a large thick-bottomed pan heat butter. 
  8. Add all-purpose flour and stir constantly until you smell a nice toasty aroma. (We want the flour to roast well and lose its rawness but, at the same time we do NOT want it turning colour) 


  9. Lower heat and gradually add the chicken stock, all the while stirring continuously to ensure the sauce does not turn lumpy. 
  10. Gradually add the milk (one cup at a time); keep stirring on LOW flame till you get a smooth, thick white sauce. The sauce should thickly coat the back of a spoon. 


  11. Add 150 grams cheese and stir until it becomes one with the white sauce. 


  12. Add the green chillies, Mrs Dash seasoning (optional). 


  13. Add salt and pepper, to taste, as needed. (Check for seasoning, as cheese is salty and the chicken stock, too, contained salt) 


  14. Add the mushroom, corn niblets and shredded chicken. Stir to mix well. 


  15. Remove the white sauce contents into a large 9-inch Pyrex, or Borosil, baking dish. 


  16. Top with remaining 150 grams of grated cheese. 


  17. Bake for 40-45 minutes at 200 degrees C until the top to gets to a warm golden brown colour. Remove and serve hot!


 Chef Notes:

  1. This quantity usually suffices for a family of 4 or 5 people. If you are cooking for 2, I suggest you halve the quantity. With regard to quantity, do not go by the photographs posted; I had tripled the quantity as I was cooking for a potluck party.
  2. Usually, béchamel is made with milk but to give the bake added flavour, somewhere along the years, I began adding a wee bit of stock to it. You may go the traditional route if you so prefer - omit the stock and add the same quantity of milk, instead. 
  3. As the roasted flour is hot, the milk and stock must be at room temperature. To a large extent, that will prevent the formation of lumps when you stir the liquids into the roux. 
  4. IMPORTANT: Unless you are extremely well versed with the cooking of the white sauce, always ensure you add the stock/milk and stir the white sauce on LOW flame. This, too, ensures the sauce does not turn lumpy. 
  5. Please feel free to adjust the number of green chillies to suit your tolerance of spice. The same goes for cheese. If you prefer a cheesier bake, feel free to add more (or less) cheese. 
  6. Variation to Point No: 16 - Instead of sprinkling grated cheese on top of the bake, I sometimes use Cheeseling gravel (crushed cheeseling biscuits). Give it a try, it works beautifully. 
  7. If you do not have the 'Mrs Dash' seasoning, just go with salt, pepper, and green chillies. Trust me, that’ll work just as well. You may substitute Mrs Dash with a few shakes of bottled mixed dried herbs. 
  8. Please don’t panic if your white sauce has a few lumps. Take the vessel off the stove, use a motorized hand blender, and give the white sauce a whiz to smoothen it. Voila! Smooth sauce 😉 Put it back on the LOW flame and stir continuously until the sauce thickens to the desired consistency. 
  9. Depending on the oven, sometimes, the base of the bake-dish will cook and begin to bubble while the cheese on top fails to brown. In the event of this happening, feel free to turn on the grill/broiler mode of the oven for a few minutes to brown the top of the bake-dish.
  10. You may share the direct blog-link of the recipe/s but do NOT publish my recipes and my photographs on any blog-site or website without my explicit consent or attempt to pass off my recipe/s as your own. You will be held accountable for plagiarism.
Some more photographs:


Tuesday, 22 December 2020

Coorg Pandi (Pork) Curry


I’d read this recipe many a times but was petrified to attempt it. Reason being, while I’ve cooked and eaten various meats, and offal, all my life, but when it comes to pork, I’d only eaten lots of it. I’d never cooked pork at home. Well, that was about to change coz when a friend mentioned he was visiting the local pork shop, I (bravely) told him to buy some for me. 😊 Once the oink reached me, there was no going back. Now, I had to cook it 😉 

Question: What recipe should I select for my first oink cook?
Fortunately, that decision was a no-brainer. I was extremely inspired by a very dear friend (Keroo) who had attempted a different Coorg Pandi recipe (via You Tube). Another reason being, I had sourced a bottle of Kachampuli Vinegar and was very eager to use it. 😊

This dish is nothing great to look at coz the Curry turns a dark, dark colour (nearly black) but flavour-wise, it’s a frikkin’ bomb! The kind that pleasantly explodes on your palate. 😊

Ingredients:


1½ kilo boneless pork chunks (with fat), wash and cut into 1½ inch cubes
2½ teaspoon turmeric powder
3 heaped teaspoons red chili powder (I used deghi mirch)
7 medium onions, peel and cut into large cubes
11 green chilies, break into 1-inch pieces (I used the long variety that’s not too spicy)
1½ pod garlic, peeled (weight AFTER peeling – 30 grams)
9 tablespoons Pandi Masala (recipe posted below)
1½ tablespoons Kachampuli Vinegar, or to taste
Salt to taste


Method: 

  1. Marinate the pork chunks in turmeric powder, chili powder and salt to taste. Give it a good mix. Keep aside for 30 minutes.


  2. Grind the onions, green chilies, and garlic into a smooth paste. Do NOT add any water to grind this as the onions will release quite a bit of its own. (In case you feel the need to add water, please add merely 1 tablespoon, no more) 


  3. Add the marinated pork to a pressure cooker, add 3 tablespoons water (please do NOT add more) and pressure cook for 6 whistles. (IMPORTANT: Immediately lower the flame after the first whistle, and continue cooking on low flame for the next 5 whistles) 


  4. Shut the stove after 6 whistles. Allow the pressure to release by itself and when the cooker has cooled down, open and remove the cooked pork into a large (non-reactive) vessel. (I used a large non-stick pan) 


  5. Put the oink back on heat and when it begins to bubble, add the ground onion paste and give it a good stir and cook for 2 to 3 minutes on medium flame. 
  6. Add the Pandi Masala and stir well to ensure the masala is well mixed into the bubbling gravy. 


  7. Continue simmering for 3 to 4 minutes. 


  8. Add Kachampuli vinegar. Give the gravy a good stir and simmer for 2 more minutes. 


  9. Adjust seasoning and simmer for a minute more if adjusted. 
  10. Serve with pau or soft steamed rice. (I preferred it with soft steamed rice)


Pandi Masala

11 tablespoons coriander seeds
4½ tablespoons cumin seeds
5 Byadagi Chilies
16 dry red Guntur chilies
1½ teaspoons mustard seeds
3 tablespoons black peppercorns
½ inch cinnamon
2 cloves
A handful of curry leaves
6 grains of fenugreek seeds

Before Roasting

Method: 

  1. Roast each of the Pandi masala ingredients, SEPARATELY, until well roasted and quite dark in colour. Please roast each ingredient carefully, tossing them around all the time to ensure they do not burn. NOTE: Roast the curry leaves and chilies well, but not to a very dark shade. Just roast them well, until crisp.

    After Roasting 

  2. As each ingredient gets roasted, keep adding them into a large plate to cool down. 


  3. When the roasted ingredients are cool, dry grind them, together, into a powder. 


  4. This will give you approximately 120-125 grams of Pandi Masala. Cool and store in an air-tight bottle. 


Chef Notes: 
  1. Please note, Guntur chilies are spicy. Adjust the quantity of ground Pandi masala that you add to the gravy as per your tolerance. For us, this proportion was perfect! The final result was spicy and tangy without any of us having to use an ice pack the next morning. *evil grin* If you prefer a very spicy blend of curry, I suggest you increase the quantity of Guntur chilies. 
  2. Please do NOT use lean pork for this recipe. 
  3. The pork is cooked (in the cooker) on low heat, hence, please do NOT cut the pork smaller than 1½ inch chunks as chances are, the meat will disintegrate. Bigger chunks will be fine but do NOT cut the oink into tiny pieces. 
  4. When you empty out the pork from the cooker, please remember to use a non-reactive vessel like enamel, stainless steel, or non-stick, as you will be adding vinegar to the gravy. 
  5. You may take this recipe a wee bit further by sautéing the meat to a dry consistency, thereby turning the curry into a dry version of Coorg Pandi Fry. This can be served as a starter over crackers, as a filling for puff pastry or in vol-au-vent cases as party finger-food. 


    Coorg Pandi Fry (The Dry Version)

  6. If 1½ kilo pork is a bit much for you, halve the recipe. 
  7. I had sourced Kachampuli Vinegar (from Amazon) but if it is unavailable to you, you may substitute it with tamarind paste. The flavour will differ but the recipe will work with that, too. Also, adjust the tanginess to suit your preference. For me/us, 1½ tablespoons of Kachampuli was perfect. 


  8. I checked out many recipes on You Tube, and finally homed in on two that I liked. While I mainly stuck to the ingredients and method used in Sidhartha’s Kitchen, the Pandi masala is a combination of Sidhartha’s recipe and another recipe. For the life of me I cannot find the second recipe, nor do I remember the name of the channel. Apologies for that! 
  9. You may share the direct blog-link of the recipe/s but do NOT publish my recipes, and/or my photographs, on any blogsite or website without my explicit consent or attempt to pass off my recipe/s as your own. You will be held accountable for plagiarism.

    Some more photographs:


                                                                  Whole Spices Before Roasting

                                                                     Whole Spices After Roasting