Pages

Friday, 5 July 2019

Bacon Papeta Par Eda – Eggs on Bacon-Potato


(Parsi lingo: Edu = one egg / Eda = many eggs)

If you have Parsi friends, you are sure to know that we are a community that loves eggs. We love cracking eggs over various vegetables and certain fruits too. We usually make Papeta Par Eda but this time the carnivore in me was craving hardcore non-veg. What better than bacon, eh? 😉 I had no intention of posting this 

Ingredients:

6 large potatoes, quartered and then cut into thin slices
200 grams smoked bacon cubes (I used Prasuna brand)
1 teaspoon cumin seeds
3 large onions, chopped
8-10 green chillies, finely chopped (adjust according to your spice tolerance)
3 cloves garlic, finely chopped
1 tablespoon ginger-garlic paste
Salt, to taste
4-5 tablespoons oil
6 eggs
Coarsely ground black pepper


 Method:

1.    Heat oil in a wok, splutter cumin seeds.
2.    Add green chillies, onions, garlic and sauté till the onions turn a tad soft.
3.    Add the bacon and continue cooking the onions until golden brown. 


4.    Add the ginger-garlic paste and sauté for a few seconds until you get that lovely ginger-garlicky aroma.
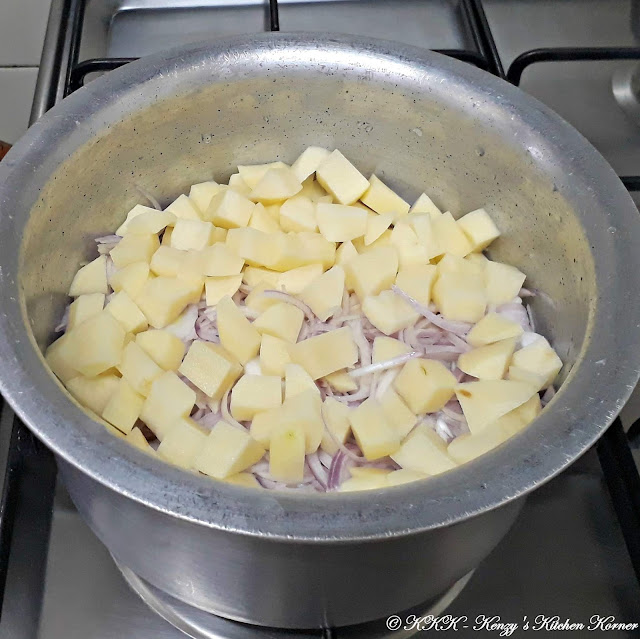
5.    Add the potatoes and toss them well in the onion-bacon mixture. Season the potatoes with salt.


6.    Cover and cook on very gentle flame, stirring very carefully and intermittently, till potatoes are cooked.
7.    Empty out the cooked potatoes in non-stick pan and flatten them out, evenly.
8.    Carefully break the eggs over the hot potatoes.
9.    Cover and cook on gentle heat.
10. When the eggs are semi set, sprinkle some coarsely ground black pepper over it. 


11. Cover and cook till eggs are set to your liking (hard yolk or soft).


Chef’s Notes:
  1. Alternately, you can also separate the whites from the yolks, beat the whites quite stiff, add the yolks and beat again, layer that over the potatoes and cook on low flame till the eggs set. This sets like a soft mousse over the potatoes.
  2. At the end of cooking point no 6, if you like the potatoes to have bits of crisp, continue cooking, uncovered, for a little while to allow the base to crisp up. We love the crisp bits hence we always cook the potatoes a bit longer.
  3. Do not go overboard with the oil as the bacon cubes will also lend its share of delicious fat.
  4. You may use chopped strips of bacon instead of cubes but, if doing so, add them a tad later along with the potatoes.
  5. Please mix the potatoes gently. You do not want a mashed mess in your wok or pan. 
  6. You can also have this as Potato-Bacon Bhaji…. but, of course, the eggs lend the dish more ‘oomph’. 😊
  7. I usually cook the potatoes in advance. I gently reheat the potatoes at dinner time and then proceed to lay them out in a non-stick pan as mentioned in ‘Method-Point No 7'.


  8. You may share the direct blog-link of the recipe/s but do NOT publish my recipes and my photographs on any blog-site or website without my explicit consent or attempt to pass off my recipe/s as your own. You will be held accountable for plagiarism.

    Oh yes, I love a runny yolk :) 

Wednesday, 26 June 2019

Dahi Ni Kadhi – The Khorshed Way!


When I moved to Pune 3 decades (and more) ago, I (aptly) knew my way around a kitchen but I learnt certain recipes and certain, tiny but important, nuances of the kitchen under the kind and patient guidance of my sis-in-law, Khorshed. She’s my eldest ‘jethani’ and I’m not much for words, face to face, but Khorshed is someone very close to my heart (oh, that does not mean I don’t trouble or rile her 😉). This is her recipe.

I’m no poet but I’ve penned this for her….

Through all the ups and all the downs,
Though all the smiles and all the frowns,
We’ve been through it all and more,
But one thing I know for sure,
No matter what the circumstances,
No matter where we’re led in life’s game,
We’ve been family; we shall remain the same! (Touch wood! 💕)


Ingredients:

3-4 green chilies, chopped fine
8-9 cloves garlic, chopped fine
½ kilo bland thick curd/yogurt/dahi (NOT sour)
1 big onion, chopped fine
¼ teaspoon cumin seeds
¼ teaspoon mustard seeds
Few curry leaves
½ teaspoon chili powder
1/3 teaspoon turmeric
Salt, to taste
Powdered sugar, to taste
1 tablespoon oil

Method:

  1. Heat oil in a stainless steel kadhai/wok.

  2.  Add cumin seeds, mustard seeds, green chilies, garlic, curry leaves and splutter for about 30 seconds.


    .
  3. Add onion and fry till golden brown.


  4. Add chili powder, turmeric powder, a wee bit of salt and sauté. Remove from fire and keep aside.


  5. Take curd in a stainless steel or glass bowl and whiz with an electric hand blender to smoothen it (this will thin out the curd to some extent).
  6. Add a wee bit of salt. Give the dahi a whiz. 
  7. Add sugar to taste and give it a good whiz with the hand blender until the sugar is well incorporated.
  8. Add the seasoned-sweetened curd to the spice mixture in the wok. Mix the masala into the dahi until it all comes together evenly.
  9. Put the wok back on the stove on VERY LOW HEAT. (I cannot emphasize ‘very low heat’ enough.)
  10. Stir CONTINUOUSLY and stir well till the kadhi heats up gently and evenly. Do NOT allow the kadhi to boil/bubble and do NOT let up on the stirring for even a few seconds.


  11. Once the kadhi is hot (not boiling/bubbling), take it off the stove, check seasoning, add if needed. If you add extra seasoning, put the kadhi back on low flame; stir continuously for half a minute. Serve with piping hot rice or khichdee.

Chef’s Notes: 

  1. You may add a wee bit of water to thin out the dahi, if you so like. As mentioned earlier, the gentle whizzing will thin it a bit. I prefer not to add water.
  2. Adjust the salt and sugar to taste. Dad hates sour kadhi which is why the kadhi made at home is usually sweet and spicy with a light hint of tang (from the bland dahi - yes, even bland dahi will have a faint hint of tang).
  3. Put the wok on the stove only after you have evenly mixed the dahi into the masala.
  4. When you put the masala-mixed dahi on the stove please adjust the stove flame to the LOWEST setting.
  5. When I say stir continuously, do not merely mean stir in a circular motion. Stir the kadhi all over the base of the vessel and the sides. At no point in time should the dahi get overly heated from one corner of the wok or bubble and boil. If at all that happens, the kadhi is sure to curdle/split.
  6. Please use a wooden spoon to stir the kadhi evenly. The ladle you see in the photograph is merely used to serve the kadhi. 
  7. Ensure you serve the kadhi with piping hot rice/khichdee. I say this because the kadhi will be hot, but it can never be piping hot.
  8. You can serve Dahi Kadhi Rice with various kinds of fried fish, dry fish preparations, papads and pickles.
  9. You may share the direct blog-link of the recipe/s but do NOT publish my recipes and my photographs on any blog-site or website without my explicit consent or attempt to pass off my recipe/s as your own. You will be held accountable for plagiarism.


My trusty old Big Boss Electric Hand Blender

Saturday, 22 June 2019

Chorizo – Goan Sausages


I was merely a school going kid when I had my first taste of Chorizo. At the time we merely knew of them as Goan Sausages. Mum hated to cook; still hates to cook. She rarely cooked even when I was a kid. I don’t hold it against her, she was a working mum and it was just something she disliked, as simple as that. Even today, you have a much better chance of seeing a blue moon then you have of seeing my mum in the kitchen. Yeah, she puts a blue moon to shame. *very evil grin* In those days (mid 1970’s) a friend gave her a packet of ‘goan sausages’, told her they were darn easy to make and guided her with regard to the recipe. I follow the very same recipe to this day. Yes, finally a recipe handed down to me by my mum. I know, I know, I’m being very evil, but I also know, she wouldn’t want me to be any other way. ðŸ˜‰  

Ingredients:

1 packet/400 grams Smoked Chorizo (Goan Sausages),
8 large onions, roughly sliced
3 to 4 large potatoes, diced into 1-inch cubes
Salt to taste
Water as needed


Method:

1.    Cut the strings with which the Chorizos are tied.


2.    Snip open the sausage casing  and remove the chorizo meat from within. Discard the casings. Keep the chorizo meat aside.


3.    Place half the quantity of the sliced onions in a vessel. Place half the quantity of sausages over it. Cover the sausages with half the quantity of diced potatoes. 


4.    Repeat the layering (onions-sausages-potatoes) with the remaining ingredients.
5.    Add enough water to cover the ingredients and bring the contents to a rapid boil.
6.    Lower heat; cover the vessel with a lid. Please use a lid that can hold water. 


7.    Pour half a glass of water into the lid that covers the vessel. Allow the chorizos to cook on low heat. (Adding water to the lid ensures the base does not burn while cooking – it helps the contents retain moisture – something told to me by my Gran)
8.    Intermittently, carefully lift the lid, give the contents a gentle stir. If more water is needed to cook the chorizos and the potatoes, add as needed.
9.    When chorizos and potatoes are nearly done, check seasoning (salt) and add if required.
10. Cover with lid (add more water into the lid if required) and continue cooking until the potatoes and chorizos are cooked.
11. The combination comes together as a nice thick gravy which is best had with crisp brun pau or a crisp baguette. 


Chef’s Notes:

1.    In the photograph/s I have posted I used Chorizos with the casing and discarded the wrapper after cooking (and clicking - silly me! Sigh!). When I remade the dish a couple of weeks later, I remembered to do away with the wrapper and then cook the dish. Turned out way better. That is precise why the recipe tells you to snip off the wrapper and discard it.
2.    I’ve cheated with the Goan Sausage casing pics and have used the same ones I used for the Chorizo Pulao recipe. I saw no point in re-clicking and water marking the pics.
3.    Usually the spices added to the sausages suffice (for a normal palate). In case you like very spicy food you may heat a tablespoon of oil and add chili powder as desired.
4.    Please add the salt only when the chorizos are ‘nearly’ done. This will ensure you don’t add too much as most of the excess water will have dried out by this time.
5.    Please add water to the dish and to the lid as and when required to ensure the food does not burn at the base of the vessel.
6.    It’s an easy-peasy recipe; so now you know why mum gave it a try. 😉
7.  You may share the direct blog-link of the recipe/s but do NOT publish my recipes and my photographs on any blog-site or website without my explicit consent or attempt to pass off my recipe/s as your own. You will be held accountable for plagiarism.


Thursday, 20 June 2019

Multi-Purpose Masala


When I posted this on Instagram and my FB timeline, little did I know friends would ask me for this basic recipe. I never ever thought I’d be asked to post it, which is why I merely clicked one photograph of the finished product. The other (process) pics you see on my blog are cheat pics. I merely picked them up from my other recipes to give my readers a generalized idea of how the recipe progresses.

I use this masala mix for various dishes. It comes in handy when I have to make Akoori (or Bhurji), Sali Par Eda, Dal/s, Masala Bhaat or even Prawn Patio. When you’re in a rush, you can use it as a base for various meat dishes too. This recipe is sure to lessen your burden in the kitchen when you are hard pressed for time. 😊

Ingredients:

6 large onions, finely chopped
6 to 7 green chilies, slit and finely chopped
7 to 8 large tomatoes, halve and grate, discard skin
1½ teaspoon cumin seeds
3 heaped teaspoons ginger-garlic paste
4 teaspoons red chili powder (I use MDH Deghi Mirch)
1 teaspoon turmeric powder
1 teaspoon black pepper powder
2½ teaspoons Parsi Sambhar Masala (optional or buy it online)
1 teaspoon Parsi Dhanshak masala (optional or buy it online)
2 teaspoons coriander-cumin powder
Salt to taste (plus a wee bit extra)
Oil as needed (and a big extra splash to preserve the masala)

Method:

1.    In a wok/kadai heat oil; splutter cumin seeds.
2.    Add the chopped onions and green chilies.


3.   Fry the onions till they are soft, translucent and begin to turn brown at the edges. (You may also fry them to a light golden, if you so wish)


4.    Add the ginger-garlic and fry for a few seconds.


5.    Add the chili powder, turmeric powder, Parsi Sambhar masala, Dhanshak masala, coriander-cumin powder and salt. Sauté for a few seconds or until the masala is well blended. Do not allow the masala to burn.


6.    Add the grated tomatoes.
7.    Cook until the tomatoes are rid of the sour raw tomato smell, the tomatoes turn mushier and are well blended in the oil.


8.    When large flecks of oil begin to surface over the masala, cook the masala for an extra two to three minutes on medium flame, stirring intermittently, until most of the oil begins rising to the top.


9.    Check seasoning and add extra if needed and simmer for a few more seconds.
10. Take the masala off the stove. Empty it out into a tight-lidded stainless-steel box.


11. Allow it to cool… thoroughly. Do NOT close the lid before it cools as it will create moisture within the vessel and, resultantly, the masala will not keep too long.

Chef’s Notes:

1.    Feel free to experiment with various variations. A few examples: I add diced potatoes and a cube (or two) of Chicken stock to this masala when I make masala bhaat/khichdee. For the Prawn Patio I merely add prawns and adjust the sweet and sour flavour once the prawns are cooked. To make Sali par Eda, I heat some of this masala, then add water to it depending on the amount of Sali I am using, add Sali, check the seasoning and make Sali Par Eda as usual.
2.    Please feel free to adjust the spices depending on your tolerance level for spice. I usually keep this masala a tad salty, spicy and oily. That way when use it I merely adjust the spices and seasoning a wee bit (or not at all). The oil and salt also act as preservatives. This masala easily keeps, in the fridge, for a month.
3.    Always use a dry spoon when you handle this masala. A wet spoon is sure to give you a vessel full of mould-y masala within a few days.
4.    Alternately, you may use chopped tomatoes, but I prefer the texture of masala with grated tomatoes. In case you decide to use chopped tomatoes, please ensure they are cooked until completely mushy and are devoid of excess moisture.
5.    This quantity makes approximately one kilo of Multi-Purpose masala. Keep it all in one big container or divide it into 5 boxes of 200 grams, as individual use, for various recipes. 200 grams works perfectly if you are cooking a dal or a meat dish for a family of four.
6.    You may share the direct blog-link of the recipe/s but do NOT publish my recipes and my photographs on any blog-site or website without my explicit consent or attempt to pass off my recipe/s as your own. You will be held accountable for plagiarism.

Saturday, 15 June 2019

Tathya – Be Truer To The Food You Serve!


I was craving Indian food and I wanted to visit some place new which is why Priyus and I chose ‘Tathya’, for our one on one, monthly, meet-up. Tathya is located at the new Mills Compound, Sassoon Road.


The interiors are tastefully done up. They usually have dim lights so if you are planning to click photographs, request for a table that has brighter lights (they have one such table). 


Their bar seems well stocked. The loos are clean. They have a shoe polishing stand in the bathroom but no toilet paper. I found that to be a tad weird. There are more chances of people visiting the loo, wanting to wipe their tushy rather than wanting to have their shoes polished. Just saying, justttt sayinggg! *evil grin*


Now on to the service aspect. They need to employ a consultant/soft skill trainer to train their servers and build their confidence. I saw servers standing by discussing stuff instead of keeping their eyes on the room to check if anyone was trying to draw their attention. I was and they were engrossed in talks of their own. Also, with regard to setting the table and being knowledgeable of the menu, most had no clue, and, at each time, would run to call the Captain. Running around like headless chicken is not my idea of ‘good service’. 


Time and again, I saw a young chef come out from the kitchen to stand and gab-giggle with the servers and no, they were definitely not discussing food orders, they were merely ‘gappa-marofying’. I have to say, though, at all times, the servers were definitely polite and courteous.


Getting on to the food…

We began with a Karari Roomali Roti which should, ideally, have been brought to the table very carefully but was brought chipped at one corner. I let that pass and we dug in as we were very hungry. 


The roti was absolutely bland, it had absolutely no seasoning, no spices (chili powder or chat masala) sprinkled on top, no butter or ghee drizzled. It was a dry, dry, dry roomali roti. The chef simply made it ‘karara’ and threw chopped onion, tomatoes and sev over it. Raw onions, raw tomatoes, a bit of sev do not a Karari Roti make! Btw, it’s priced at Rs 240 and I’ve had it at other places for the same price, but they were way, way better and well worth the price. This one was NOT! Until they get this right, do not try it.


I ordered a Mutton Paya Soup. I had asked the server if the soup would have paya in it and he had replied in the affirmative. What you see in the pic is what I got. A long bone with sinew that i could not chew. The soup, though, was nice and meaty in flavour but, this too, lacked seasoning. I added a dash of salt and pepper and voila! It turned into a flavour bomb! Absolutely yum!  I’d request the chef to check the seasoning for the food he cooks. I’d definitely have this again!

Our choice for starters were Galouti Kebab with Sheermal and Mushroom Multani. 


The Mushroom Multani was excellent. Absolutely no complaints there. If you like mushroom, do not miss out on this dish! 


As for the Galouti Kebab with Sheermal: the Sheermals were nicely made but the ‘infusion of saffron’ (as mentioned in the menu), simply did not come through. It definitely needs a stronger infusion. Taste-wise, I could not fault the spice-mix of the Galouti kebabs, but the texture was definitely wrong. Galoutis are pasty and have a melt-in-the-mouth in texture. The mince for this was merely finely ground. It definitely did not melt on my palate. Achieve the ‘melt-in-the-mouth’ texture and this one will go on to be a winner.


For mains, we chose, Zaffrani Malai Kofta, Nihari Gosht, Lasooni Dal Palak, Churchur Paratha and Butter Garlic Naan.


The gravy of the Zaffrani Malai Kofta was delish. Creamy with a hint of sweet. The koftas, ideally though, should have been soft balls of stuffed cottage cheese but in actuality were hard balls of stuffed cottage cheese. As my friend said in Marathi, ‘chivvat aahes’. She wasn’t wrong!


The Nihari Gosht wasn’t a bad dish. It had a nice gravy, but it wasn’t a ‘Nihari’ gravy. Also, they should probably change the of this dish to Nihari Haddiya. The server came up to me and mentioned they use curry cuts instead of Nallis. I told him I was fine with curry cuts. When the dish arrived at the table, I took 2 pieces of mutton, they turned out to be bones (with NO meat on them). I took three more pieces, with the exact same result. I dug into the bowl of gravy trying to find a piece of mutton and, luckily, I found a tiny piece that needed an extra 10 to 15 minutes on the stove. You get my drift, right? The remaining two pieces in the gravy were also bones hence decided to leave them right where I found them. Seven pieces of bones with NO meat on them and 1 tiny one-inch piece that was a tad tough to eat. What in the world did I pay Rs 560 for? Why not reduce the pieces of mutton to 5 instead of 8 and ensure the customers get good meaty pieces? I felt totally cheated with this one. Again, until they improve the dish, do not waste your money over this one.


The Lasooni Dal Palak was flavourful but here too, it wasn’t perfect. Some strands of the palak felt raw to the palate. It was as if the chef wanted to hurry up the cooking process so he could walk out of the kitchen and gab-giggle with the rest of the staff. I did mention he did that earlier. 


The Churchur Paratha and the Garlic Butter Naan were very nice, especially the Garlic Butter Naan. We loved it! I could easily eat it as a snack, all by itself.


We finished the meal with Kulfi Falooda. It was excellent! The quality of rabdi and kulfi were superb! The quantity of sabza spooned over the kulfi and the sev over which the kulfis were placed were also sufficient in quantity. 


They hadn’t been stingy with either and I LOVED that! This should definitely go on the ‘MUST-TRY’ list.


The portion size of the dishes is good which is why the prices seem to be quite okay but they cannot get away with serving bones in dishes where they need to serve mutton. That is definitely NOT done. You call yourselves ‘Tathya’ (truth-true-fact), you need to be true to the food you serve. I look forward to visiting you again, maybe with lesser or no complaints to pen.

They charged us 5% service charge which was okay. I did not feel the need to round it off to 10%. The total bill amount was INR 4367. I used a food app which gave me a dish free and the total went on to be INR 3807. When I checked the bill, they had overcharged us for a Fresh Lime Soda. I brought it to their notice, and they took it off the bill. The final amount paid was INR 3657. Always remember to check each item on the bill. It’s NOT bad manners (or cheap) to do so. It’s your right because it’s your hard-earned moolah.

Food: 2.5 (lots of misses which, ideally, could have been hits)
Ambiance: 3/5
Service: 2.5/5
Overall: 2.75/5

Address: The Mills Compound, Behind Sheraton Grand, 7 to 10 R.B Motilal Road, F&B Unit 2&3, Bund Garden Road, Pune
Tel: 020 71967619

Tathya Menu, Reviews, Photos, Location and Info - Zomato