Pages

Showing posts with label Parsi Dessert. Show all posts

Friday, 17 April 2020

Bread Pudding


Traditional Bread Butter Pudding is fine, but every once in a while, I like to take a recipe a tad further and put my own twist on it. Also, this one has absolutely no butter, but it's so decadent you're not going the miss the butter at all. This is my way of making Bread Pudding. It is not the traditional dry style of bread pudding; the one served with a custard sauce. I like my Bread Pudding soft from within and, crisp and chewy from the top. The texture of this is such, one does not need any custard sauce to go with it. This version is neither dry and nor is it totally mushy. I promise you, though, you’ll love the final outcome. Enjoy!

Ingredients:

1-liter full fat milk
24 heaped teaspoons granulated sugar
5 slices of stale white bread,
3 eggs
1 teaspoon vanilla extract
1/8th teaspoon nutmeg powder
1/8th teaspoon cardamom powder
Half a handful of mixed nuts (pistachios, almonds, cashew nuts) – optional

Method: 

1.    If you are using mixed nuts for garnish, chop into slivers and keep aside.


2.    Cut the crusts off the bread slices and cut the slices into pieces. Keep aside.


3.    Heat milk in a large vessel.
4.    Add sugar to sweeten.


5.    When the sugar melts, remove from the vessel from the stove and allow the milk to cool to room temperature.


6.    Break eggs into a bowl, add vanilla extract and the cardamom and nutmeg powders.


7.    Beat eggs well but not too frothy. I merely use a hand rotor to whisk.


8.    Add the beaten eggs to the cool, sweetened milk and give it a good whisk to ensure the milk and eggs are well incorporated.


9.    Add approximately three chopped slices of bread to the milk and whisk. The break should soak and break down in the milk.


10. Preheat oven to 200 degrees C for about ten minutes.
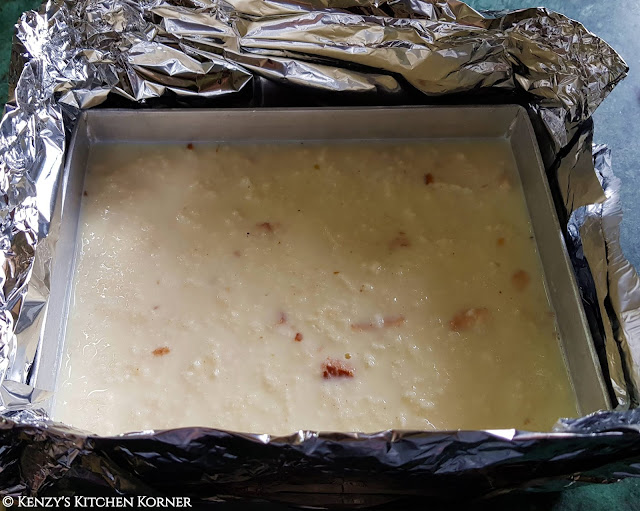
11. Empty the milk-egg-bread mixture into a baking tray.


12. Scatter the remaining bread pieces onto the top of the milk and allow them to ‘float and soak’ for 10-15 minutes. Do not squash these into the milk.


13. Put the baking tray into the middle slot of the oven and bake for 30 minutes.


14. At the 30-minute mark, slide out the tray and sprinkle the slivers nuts, if using. If you aren’t using the nuts for garnish, ignore point number 14.
15. Continue baking for 30 more minutes or until a knife comes out clean.


16. If you prefer a nice, slightly crisp, chewy top, switch off the main oven and switch on the broiler mode (top grill that lends heat from above) and continue baking until the bread pudding achieves the colour you desire.


17. Remove tray from the oven and allow to cool. This can be served at room temperature and you can also keep it in the fridge for 4 to 5 hours and serve it cold.


Chef Notes:

1.    I used normal, stale sliced white bread but if you have baguettes or croissants, please feel free to use them. Mostly any kinda bread works... No, no not sourdough or rye, please. Thodi apni bhi akkal lagao. 🤦‍♀️ Please note, stale bread works beautifully for this dish so if you have leftover stale bread, just go with that.
2.    The reason I whisk up a few slices into the milk is because it lends a lovely creamy texture to the pudding. The dry kinda bread pudding is so not my thing.
3.    Also, the reason I add remaining pieces of bread to ‘float and soak’ is because they turn beautifully crisp and chewy because of the limited soaking and the sugar content. This way the bread pudding is neither dry nor is it totally mushy. The soft texture within and the crusty-chewy texture on top is a sheer pleasure to the palate.
4.    The sugar content is mentioned exactly as used by me. Feel free to adjust it to suit your palate but, ALWAYS keep the milk on the sweeter side coz you will be adding eggs and bread to it. Do consider the added eggs and bread when you sweeten the milk, or you’ll be left holding a bland pudding.
5.    Always add vanilla extract to the eggs when whisking them for desserts. It helps eliminate the egg-y odour in the dessert.   
6.    You can avoid the slivered nuts and merely opt for the chewy bread texture if you so desire. I did add them coz I’m a Bawi; we love eggs, bacon, cheese and nuts and not necessarily in that order. 😊 I did make a second batch without garnishing it with nuts to show you the crisp, chewy texture.


7.    Just to clarify, the black specks you see in the milk (process photos on the blog) is not dirt. It’s the cardamom-nutmeg powder. *cheeky grin*
8.    When baking bread pudding, do not fill the baking tray right till the top. Ensure the bread pudding mix is filled to three-fourth tray level only. This is because bread pudding tends to rise when baked and you do not want an overflowing or dripping tray in your oven.
  1. When in lazy mode, I sometimes cover the baking tray (from outside) with tall aluminum foil on all four sides of the baking tray so as to prevent oven wall splatters. Saves me an enormous amount of time from having to scrub the oven clean after the bake. Once the milk is in semi-set mode, I snip off the tall foil and proceed with sprinkling the slivered almonds. Easy-peasy! 😉
  2. I have mentioned the oven timings according to my oven. Oven settings differ, hence, once a knife comes out clean, proceed to turn on the broiler and brown the bread pudding from top. This will ensure the pudding you make does not burn.
  3. You may share the direct blog-link of the recipe/s but do NOT publish my recipes and my photographs on any blog-site or website without my explicit consent or attempt to pass off my recipe/s as your own. You will be held accountable for plagiarism.
Some More Photographs:


Saturday, 21 March 2020

The Quintessential Parsi Lagan nu Custard


When we Bawas receive an invite to a wedding, or a navjote (Parsi thread ceremony), two thoughts immediately come to mind. One, ‘caterer kaun che?’ (Translation: Who’s the caterer?). Second, I hope they have Lagan nu Custard on the menu. Fortunately (phew!), there’s hardly a Parsi wedding or navjote that’s complete without this delectable dessert. It’s rich, smooth and positively sinful. But invites to these Bawa dos don’t come too often and I don’t see why any of you should have to wait to try this delightful dessert. Go on give this a try, it's a very easy bake.

Btw, we Bawas (Parsi) pronounce this as “Lagan nu Custar”. 😉

Ingredients:

1½ liters full fat milk (I use Amul Gold or Chitale)
4 eggs, well beaten but NOT very frothy
¾ teaspoon vanilla extract/essence
6 + 16 teaspoons sugar or adjust to taste
Two pinches of nutmeg-cardamom powder (elaichi-jaiphal powder)
20 almonds, slivered

Method:

  1. Heat milk and bring to a boil. Once it comes to a boil, reduce heat and allow it to simmer until 1.5 liters of milk reduces to 1 liter.


  2. Take 6 teaspoons sugar in a clean, DRY vessel.


  3. Heat the sugar on very low heat until it begins to melt. As soon as it begins to melt pick up the vessel with a kitchen pincer/pakkad, hold it above the flame and keep moving the vessel around to ensure the sugar caramelizes evenly.


  4. As soon as the sugar turns an even golden brown, GRADUALLY AND VERY CAREFULLY pour the molten liquid into the simmering milk.
  5. Stir to mix the caramel evenly into the milk.


  6. When the milk reduces to 1 liter, begin adding the rest of the sugar, little by little. Keep checking for sweetness - to suit your taste buds. The amount mentioned in this recipe is the exact amount used by me. (Recommended: Add some extra sugar once the milk sweetens to suit your palate. I recommend this as you will be adding 4 eggs to the milk at a later stage)
  7. Take the milk off the stove and allow it to cool completely (room temperature).
  8. Beat 4 eggs with ¾ teaspoon vanilla extract/essence. (Recommended: Beat eggs with vanilla extract/essence as that helps eliminate the typically egg-y smell from the custard)
  9. Add the beaten egg-vanilla mix to the cool milk. Check for sweetness and add extra sugar if/as required.
  10. Strain the milk-egg mix into another bowl/vessel or strain it directly into the baking tray/pyrex dish.
  11. Sprinkle the nutmeg-cardamom powder, give the mixture a gentle stir.
  12. Bake in a pre-heated oven at 200 degrees C for about 20-25 minutes.


  13. At the 20-25-minute mark, carefully slide out the dish for a minute, sprinkle a few slivers of almonds. If they do not sink to the bottom, evenly sprinkle the rest of the almond slivers over the custard. Slide the dish back into the oven and bake for 10-15 more minutes or until a knife comes out clean. (Note: If the almond slivers sink to the bottom when you throw in the first few slivers to check, please bake for 10-12 more minutes and then sprinkle the remaining almond slivers)


  14. If you want a nice golden brown on top with specks of dark custard, shut off the oven, fire up the grill and continue cooking/baking until the desired color is achieved. (Note: You may have to move the baking tray/pyrex dish a few notches higher in the oven so as to allow the custard to brown under the grill.


  15. This custard can be served warm (room temperature) or cold.

Chef Notes:

  1. Apologies for the ‘caps’ at certain points in the recipe. The caps are not written to offend; only to emphasize.
  2. When you heat the sugar for the caramel, it's best to avoid using a spoon. Videos for the same are available on my You Tube channel, Kenzy's Kitchen Korner. They're simple, amateur home videos, made merely to show you the process. Do read the notes attached to the videos. That way, you won't go wrong with the caramelization process. 
  3. You may use regular milk instead of full fat milk, but the custard will lack the richness that it’s meant to have.
  4. When you add the caramel to the simmering milk, please add it very gradually and carefully (I cannot stress this enough), as the milk tends to froth up and rise in the vessel.
  5. Do remember to add extra sugar as the sweetness of the milk will reduce once you add the eggs. You really don’t want to eat a bland custard.
  6. The vanilla extract added to the eggs, to eliminate the egg-y smell, is a trick that will work with any dessert. 😉
  7. Please ensure the milk is absolutely cool before you add the beaten eggs coz you sure as hell don’t want scrambled eggs in your custard. *evil grin*
  8. Straining the milk-egg mixture is an important process as it will keep out bits of egg that haven’t blended in. 
  9. I cover the baking tray (from outside) with tall aluminum foil on all four sides so as to prevent oven wall splatters. Saves me an enormous amount of time from having to scrub the oven clean after the bake. Once the milk is in semi-set mode, I snip off the tall foil and proceed with sprinkling the slivered almonds. Easy-peasy! 😉
  10. The bake time will vary with individual ovens therefore, the first time you bake the custard, please keep an eye on the dish to ensure it does not burn.
  11. I sometimes blanch the almonds and then cut them into slivers and sometimes, I don’t. Either works so don’t fret over that.
  12. Do not add slivered almonds at the beginning of the baking process as they will settle down to the bottom of the tray if you do so.
  13. Variation: You may add ¼ tin condensed milk to the simmering caramelized milk and adjust the sugar quotient accordingly. I prefer not to, though.
  14. The photographs that you see in this recipe have been taken at various times, over the years, as and when I have made Lagan nu Custard.
  15. You may share the direct blog-link of the recipe/s but do NOT publish my recipes and my photographs on any blogsite or website without my explicit consent or attempt to pass off my recipe/s as your own. You will be held accountable for plagiarism.
Caramelization Videos:
                                                             Step 1:

I have not added any music to this video as i need you to understand the consistency of the sugar at this point of caramelization. The sound of the sugar says it all. 


Step 2: 
     Tiny points to remember when you caramelize sugar
  1. Do not use a spoon to stir the sugar or the caramel.
  2. Caramelize on very low heat; do not be in a rush or the sugar is sure to burn.
  3. Once you see the sugar beginning to melt, from any side/corner, hold the vessel with a kitchen pincer/pakkad, keep it slightly raised over the flame and keep swirling the vessel gently as shown in the video. That'll ensure the sugar caramelizes evenly. It'll also ensure the sugar does not burn or darken excessively from any one side.
  4. Once the desired colour is achieved, pour the caramel quickly (but very carefully), while it's molten, into whatever you wish to use it in.

Step 3:
The details of the video are the same as the ones mentioned in Step 2. The only difference is the sugar caramelization is just about done in this video.                                             

                                                                    Step 4:
In this video the caramelization process is complete. The sugar has turned into a beautiful, molten liquid of golden brown.
I used this caramel to make Lagan Nu Custard, a Parsi dessert. I carefully and gradually poured this, little by little, into the simmering milk as the milk froths up vigourously when you add the caramel to it.
For the leftover caramel that cooled and stuck to the vessel, i poured in half a cup of the same hot milk and gently simmered it until the leftover caramel began to re-melt and sipped into the simmering milk. No wastage! 😉
This process of caramelization can also be used for Caramel Custard.
Some more photographs..